How to Measure Current Safely Using a Clamp-On Ammeter
How to Measure Current Safely with a Clamp-On Ammeter
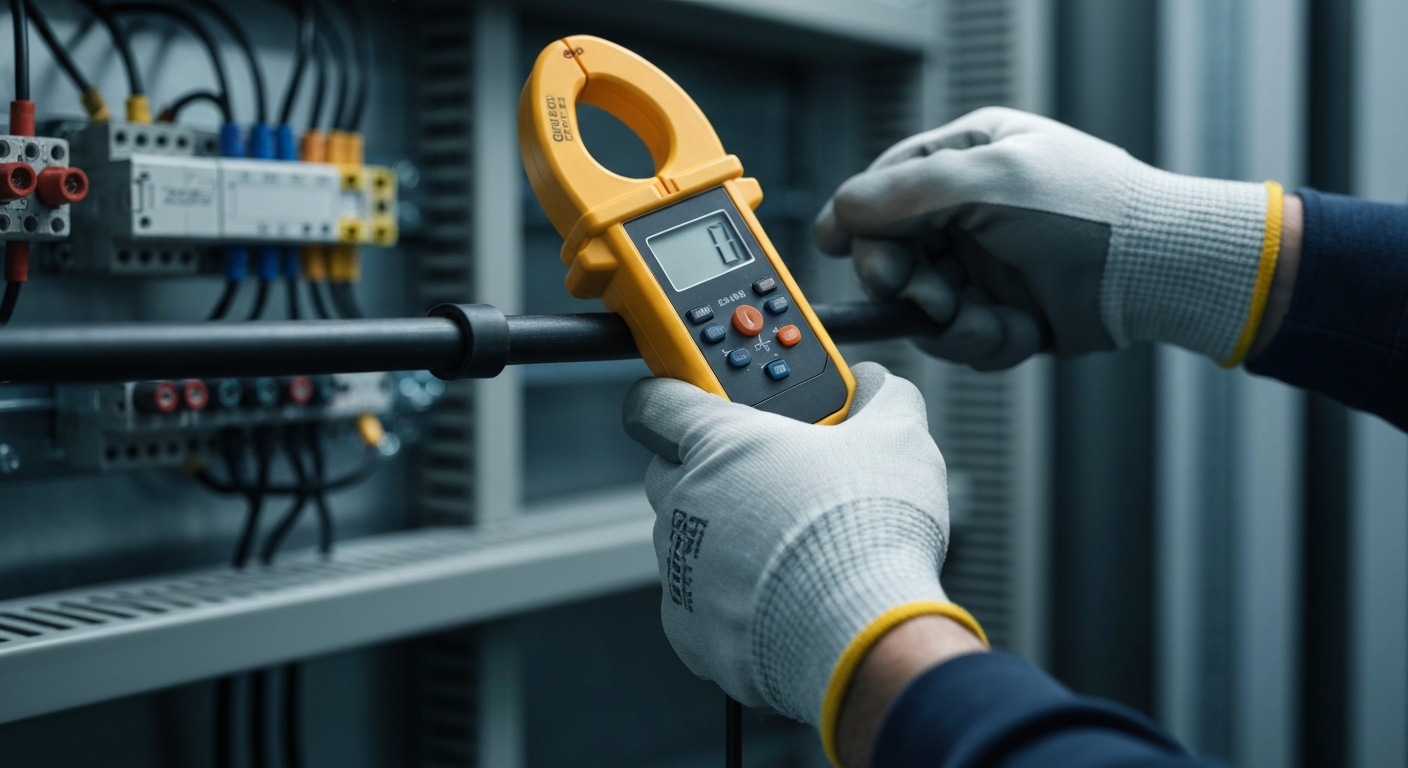
Safely measuring current is a fundamental skill for any electrician, crucial for troubleshooting, load balancing, and ensuring system safety. To measure current with a clamp meter, you must first select the appropriate AC or DC current function on the meter. With proper Personal Protective Equipment (PPE) donned, open the spring-loaded jaw and clamp it around a single, individual conductor—never a bundled cable. Clamping both hot and neutral wires will yield a zero reading as their magnetic fields cancel each other out. Once clamped, the meter provides an immediate reading in amperes (Amps). For professional applications, a journeyman electrician must understand advanced features like True RMS for accurate readings on non-linear loads and the inrush current function for diagnosing motor startups. Adhering to strict electrical safety standards and understanding the meter’s CAT ratings are non-negotiable for preventing accidents during AC/DC current measurement.
What is Electrical Current and Why Do We Measure It?
Before you can master how to measure current, it’s essential to understand what it is. The formal definition of electrical current is the rate of flow of electric charge through a conductor. This flow is quantified in a unit called the Ampere, or Amp (A). Measuring this current is vital for several reasons: it allows for effective troubleshooting circuits, ensures proper load balancing across phases, and verifies that conductors and equipment are operating within their safe design limits. An accurate current measurement is the first step in diagnosing an overloaded circuit, an underperforming motor, or an unbalanced three-phase system. For a deeper dive into the fundamental principles, explore our guide on electric charge and current.
The Essential Tool: Understanding Your Clamp-On Ammeter
Unlike a traditional multimeter that requires you to cut a wire and place the meter in series with the circuit, a clamp-on ammeter measures current non-invasively. It works by detecting the strength of the magnetic field that is generated by current flowing through a conductor. This design avoids the risks and complexities associated with breaking into a live circuit, making it a far safer and more efficient tool for daily use. This is a significant advantage, as it eliminates the need to distinguish between a series vs parallel circuit configuration just to take a measurement.
Key Features of Modern Clamp Meters
Today’s digital clamp meters are multifunctional tools packed with features that extend beyond simple current measurement. When selecting a meter, look for these critical capabilities:
- AC/DC Current Measurement: The ability to measure both alternating current (AC), common in building power systems, and direct current (DC), found in batteries, solar panels, and electronic systems, is essential for a versatile tool.
- True RMS: “RMS” stands for Root Mean Square, which is a method of calculating the effective value of an AC waveform. A True RMS meter is critical for accurately measuring the distorted, non-sinusoidal waveforms produced by modern electronic loads like variable frequency drives (VFDs), LED lighting, and computers. An average-responding meter can give wildly inaccurate readings on these non-linear loads.
- Inrush Current: Motors and transformers draw a large, brief surge of current when first turned on, known as inrush current. A clamp meter with an inrush function can capture this peak value, which is crucial for troubleshooting nuisance breaker trips and properly sizing overload protection.
- Non-contact Voltage Detection: Many clamp meters include a built-in sensor that can detect the presence of voltage without making direct contact, providing a quick and safe way to verify if a line is energized before you begin work.
Step-by-Step Guide: How to Measure Current with a Clamp Meter
Following a systematic process ensures both safety and accuracy. This procedure should become second nature for any professional performing electrician training or working in the field.
- Safety First: The Non-Negotiable Preliminaries
Before any measurement, adhere to all electrical safety standards. This includes wearing the appropriate Personal Protective Equipment (PPE), such as insulated gloves and safety glasses, as dictated by NFPA 70E and site-specific risk assessments. While you aren’t de-energizing the circuit for this measurement, understanding Lockout-Tagout (LOTO) procedures is a critical part of a comprehensive safety mindset. - Select the Correct Function on Your Meter
Turn the rotary dial on your clamp meter to the correct current measurement function. This is typically denoted by ‘A~’ for AC current or ‘A⎓’ for DC current. If your meter is not auto-ranging, select a range that is higher than your expected measurement. For DC measurements, press the “Zero” or “Relative” button before clamping to remove any offset from the Earth’s magnetic field. - Clamp a Single Conductor
This is the most critical step for an accurate measurement. Press the lever to open the meter’s jaws and clamp them around only one conductor (e.g., the hot wire). If you clamp around a multi-conductor cable containing both the hot and neutral wires, the opposing magnetic fields will cancel each other out, and your meter will incorrectly read zero or near-zero amps. Ensure the jaws close completely and the conductor is centered within the clamp for best results. - Take and Interpret the Reading
The meter will display the current reading in amperes (A). For equipment like motors, compare this running current to the FLA (Full Load Amps) rating on the nameplate. A reading significantly higher than the FLA could indicate an overload or a mechanical problem, while a lower reading might suggest the motor is underloaded. - Utilize Advanced Functions (If Needed)
If troubleshooting a motor that trips on startup, switch to the Inrush current mode before energizing the equipment. The meter will capture and hold the peak current value during the motor’s first few moments of operation, helping you determine if the surge is exceeding the breaker’s limits.
Critical Safety Considerations and Best Practices
Beyond the measurement process itself, a professional electrician must always prioritize safety and be aware of the environment and the limitations of their tools.
- Understand CAT Ratings: All test instruments are assigned a safety rating known as a CAT (Category) rating. These ratings (CAT I, II, III, IV) indicate the meter’s ability to withstand transient overvoltage events. A journeyman electrician working on distribution panels or commercial circuits should always use a meter rated at least CAT III 600V. Using an underrated meter in a high-energy environment can lead to catastrophic failure and serious injury.
- Beware of Ghost Voltage: Sometimes, meters can display a voltage reading on a de-energized line due to capacitive coupling from nearby energized wires. This is known as ghost voltage. While this is a voltage-related phenomenon, using a high-quality meter with a low-impedance mode can help differentiate it from true voltage, reinforcing the need for reliable equipment.
- Adhere to PPE and LOTO: It bears repeating. Consistent and correct use of Personal Protective Equipment (PPE) and strict adherence to Lockout-Tagout (LOTO) principles are the cornerstones of electrical safety.
- Follow the National Electrical Code (NEC): All diagnostic work and subsequent repairs must conform to the standards set forth in the National Electrical Code (NEC). Current measurements are often the first step in ensuring a system complies with NEC requirements for conductor sizing and overcurrent protection. Learn more about motor calculations and FLA in our NEC courses.
Advanced Applications and Troubleshooting
Once you’ve mastered the basics of how to measure current, a clamp meter becomes a powerful diagnostic tool for more complex issues.
Measuring Leakage Current
Leakage current is unwanted current that flows to ground, often through insulation. It can indicate failing insulation and pose a shock risk. To measure it, you clamp all current-carrying conductors in a circuit (e.g., hot and neutral in a single-phase circuit, or all three phases and the neutral in a three-phase circuit) at the same time. Since the load currents’ magnetic fields cancel each other out, any remaining reading is the leakage current flowing to ground.
Load Balancing in Three-Phase Systems
For three-phase systems, it’s critical that the current draw is evenly distributed across all three phases. Significant imbalances can cause motors to overheat and neutrals to become dangerously overloaded. Use your clamp meter to perform load balancing by measuring the current on each phase (L1, L2, L3) and comparing the values. Adjustments can then be made at the panel to redistribute single-phase loads more evenly.
Verifying Ampacity and Conductor Sizing
Ampacity is the maximum current a conductor can handle continuously without exceeding its temperature rating. A key part of any electrical system inspection is verifying that the actual current on a circuit does not exceed the conductor’s ampacity as defined in the NEC code book. Using an ampacity chart is essential for this verification. For more details on this, see our article on why ampacity charts are important. The measured current can also inform complex calculations, such as those needed when you calculate wire ampacity derating for various conditions.
The Importance of Professional Electrician Training
A clamp meter is a sophisticated instrument, but it’s only as effective as the professional using it. Proper electrician training is what transforms this tool from a simple measuring device into a key for diagnosing and resolving complex electrical problems. From troubleshooting circuits in a residential home to balancing loads in a major industrial facility, the ability to accurately measure and interpret current is a skill that every qualified journeyman electrician and master electrician must possess. This skill is fundamental when diagnosing issues with components like electrical receptacles or complex motor control centers.
Primary Sources
- National Fire Protection Association (NFPA) for the National Electrical Code (NEC): https://www.nfpa.org/NEC
Frequently Asked Questions (FAQ)
- What’s the main difference between AC/DC current measurement with a clamp meter?
- AC (alternating current) creates a constantly changing magnetic field, which is what most basic clamp meters are designed to detect. DC (direct current) creates a static magnetic field. To measure DC current, the clamp meter must be equipped with a Hall Effect sensor, and you often need to use a “zero” function to nullify the Earth’s magnetic field for an accurate reading.
- Why am I getting a zero reading when I clamp a power cord?
- This is a common mistake. A power cord contains at least two conductors (hot and neutral) with current flowing in opposite directions. When you clamp the entire cord, the magnetic fields from these two conductors cancel each other out, resulting in a zero or near-zero reading. To measure current correctly, you must clamp only one of the individual conductors inside the cord.
- What is True RMS and why is it important for measuring current?
- True RMS provides an accurate “effective” value of an AC waveform, regardless of whether it’s a perfect sine wave or a distorted (non-sinusoidal) wave. Many modern electronic devices create distorted current waveforms. A non-True RMS meter (average-responding) will provide inaccurate readings in these situations, while a True RMS meter gives a correct reading, which is essential for proper diagnostics and safety.
- How does measuring inrush current help in motor diagnostics?
- Measuring inrush current—the initial surge when a motor starts—is critical for troubleshooting. If a circuit breaker trips only during startup, capturing the inrush peak with your clamp meter can confirm if the surge is exceeding the breaker’s rating. This helps differentiate between a normal startup surge and a problem like a shorted winding or a seized motor.
Continuing Education by State
Select your state to view board-approved continuing education courses and requirements:
Disclaimer: The information provided in this educational content has been prepared with care to reflect current regulatory requirements for continuing education. However, licensing rules and regulations can vary by state and are subject to change. While we strive for accuracy, ExpertCE cannot guarantee that all details are complete or up to date at the time of reading. For the most current and authoritative information, always refer directly to your state’s official licensing board or regulatory agency.
NEC®, NFPA 70E®, NFPA 70®, and National Electrical Code® are registered trademarks of the National Fire Protection Association® (NFPA®)
You may also like

Colorado Electrical Licensing Requirements and Reciprocity Guide

Standby Generators in DE: Navigating Coastal Storm Regulations
