How to Use and Test a High Voltage Proximity Tester
How to Use and Test a High Voltage Proximity Tester
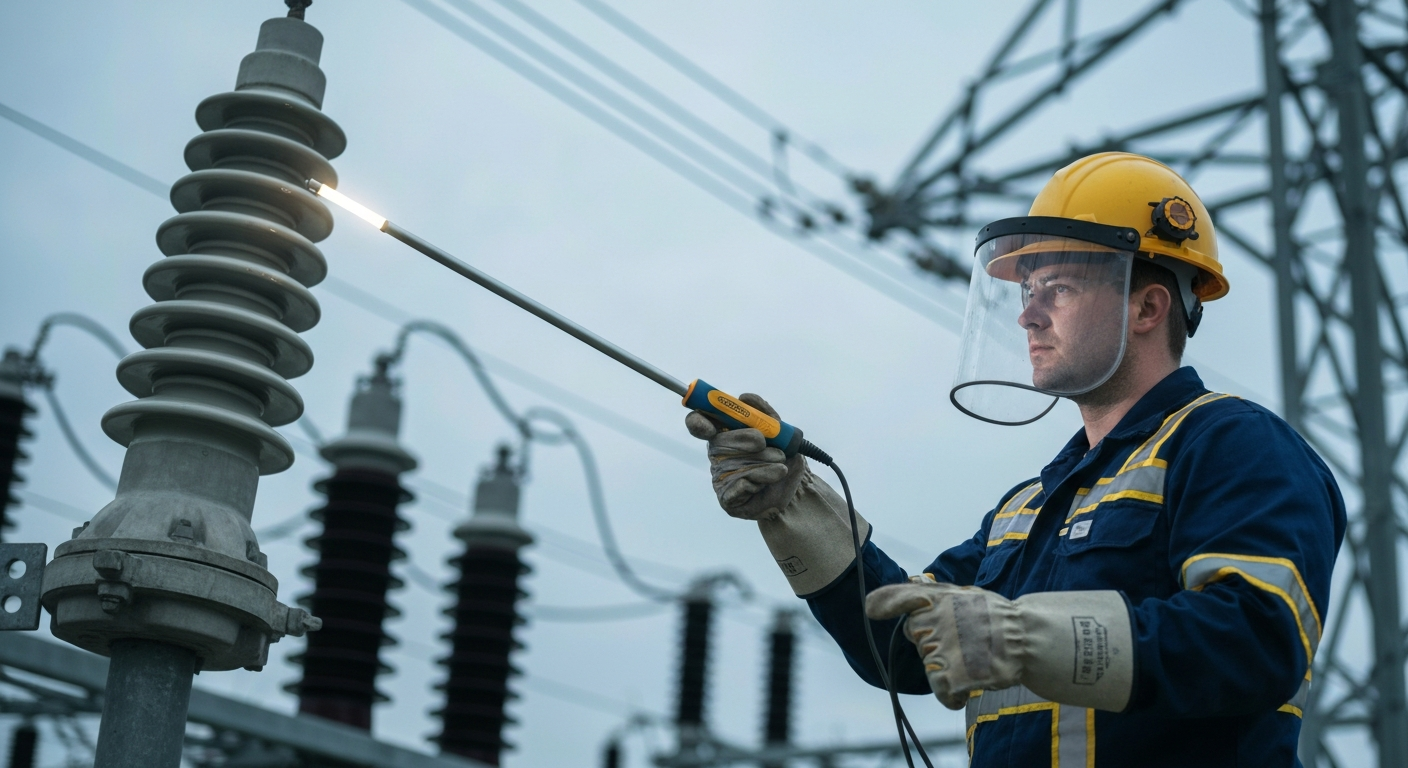
Using a high voltage proximity tester is a non-negotiable safety skill for any journeyman electrician or master electrician working with medium- and high-voltage systems. This device is critical for the verification of de-energized condition before work begins, forming a cornerstone of an electrically safe work condition as emphasized by NFPA 70E. Unlike a standard non-contact voltage detector, a proximity tester is designed to detect the radiated electric field of a high-voltage conductor from a safe distance, typically when used with an insulating extension such as a hot stick. Proper use involves a strict “test before you touch” protocol, including a device self-test, verification on a known live source, the actual line test, and a final re-verification on the known source. This process ensures the tool is functioning correctly and the line is truly de-energized, protecting workers from catastrophic injury.
What is a High Voltage Proximity Tester?
A high voltage proximity tester, also known as a non-contact high-voltage detector, is a safety instrument designed to detect the presence of AC high voltage without making direct contact with the conductor. It operates on the principle of capacitive coupling. The tester detects the radiated electric field that surrounds any energized conductor. When the device enters this field, its internal circuitry senses the voltage and provides an audible and/or visual alarm, alerting the operator to the presence of dangerous voltage.
These devices are fundamentally different from the small “pen testers” used for 120/240V circuits. High-voltage testers are built for rugged field use, feature robust insulation, and are commonly designed to be used with an insulating hot stick or other rated insulating extension so the operator can maintain required minimum approach distances from potentially energized equipment. For clarity: in the electrical standards context, “high voltage” generally refers to systems above 1000 volts (1 kV), so special high-voltage proximity testers are selected for applications above that threshold.
The Critical Role of Proximity Testers in Electrical Safety
The primary purpose of a high-voltage proximity tester is to verify that a system is de-energized before any physical contact is made. This is a key element for establishing an electrically safe work condition, a formally defined process in both OSHA 1910.269 for power generation, transmission, and distribution, and NFPA 70E, the Standard for Electrical Safety in the Workplace®. A significant proportion of serious electrical injuries involve thermal burns from arc flashes, making voltage verification one of the most important life-saving actions an electrician can take.
Both a journeyman electrician and a master electrician must be proficient in this skill. Failing to correctly verify the absence of voltage can lead to arc flash incidents, electric shock, or electrocution. Therefore, the use of a proximity tester is always paired with the use of appropriate personal protective equipment (PPE), including voltage-rated gloves, arc-rated clothing, and face shields, as determined by a thorough risk assessment.
Step-by-Step Guide: How to Properly Use a High Voltage Proximity Tester
Following a precise, repeatable process is essential for accurate and safe voltage testing. The “live-dead-live” method is the industry-accepted best practice and is consistent with the verification practices described in NFPA 70E. Never assume a system is dead; always prove it.
- Perform Pre-Use Inspection and Self-Test: Before approaching the equipment, visually inspect the tester for any signs of damage, such as cracks, dirt, or moisture. Most modern testers have a built-in self-test function. Activate it to confirm the internal electronics and indicators are working properly.
- Don Appropriate PPE and Attach Hot Stick or Insulating Extension: Based on the system voltage and the established hazard/risk assessment, don the required arc-rated PPE. Securely attach the proximity tester to a properly rated and inspected insulating extension (hot stick) or use a tester designed for the mounting method in use. This is crucial for maintaining required minimum approach distances.
- Test the Tester on a Known Live Source: This is the first “LIVE” step. Take the tester to a known energized source that is within the tester’s detection range. A positive indication (lights and sound) confirms the entire setup—tester, insulating extension, and your technique—is working.
- Perform the Absence of Voltage Test: Now, approach the target conductor or equipment you believe to be de-energized. This is the “DEAD” step. Slowly move the tester toward the conductor, performing both phase-to-ground testing on each phase and, where applicable and safe, phase-to-phase testing. An absence of alarm indicates the absence of a detectable radiated field at the test point. NFPA 70E and good industry practice emphasize performing verification at the points where work will be performed.
- Re-Test the Tester on the Known Live Source: This is the final “LIVE” step. Immediately after testing the de-energized equipment, return to the same known live source and verify the tester still provides a positive indication. This critical step proves your tester was not damaged and was functioning correctly throughout the entire procedure.
Only after successfully completing all five steps can you confirm the verification of de-energized condition. Remember: Test before you touch. Learn the correct procedure for voltage testing. For a deeper understanding of safety protocols, it’s vital to review the principles of working on energized electrical equipment and why establishing an electrically safe work condition is the preferred method.
Understanding Test Results and Common Pitfalls
Beware of Induced Voltage and False Readings
One of the most significant challenges in high-voltage work is dealing with induced voltage (also known as “ghost voltage”). This occurs when a de-energized conductor runs parallel to an energized high-voltage line. The electric field from the live line can induce a voltage onto the de-energized conductor. A sensitive proximity tester may correctly alarm on this induced voltage, even though the line is open and cannot deliver significant current. This is not a “false positive”; the tester is accurately detecting a voltage potential. Experienced electricians must use additional methods, such as using a properly rated multimeter with a low-impedance method or applying temporary protective grounds, to differentiate between dangerous primary voltage and induced voltage. Always follow your employer’s procedures and applicable standards when making that determination.
The Importance of the ‘Live-Dead-Live’ Method
The ‘live-dead-live’ testing sequence is non-negotiable because it mitigates the risk of tool failure leading to a false “dead” reading. A tester could fail for numerous reasons—dead batteries, internal damage, or a compromised insulating extension. Without the final “live” test, you would never know if the tester failed during the “dead” test, leading you to believe a line is de-energized when it is, in fact, live. As safety standards evolve, understanding these procedural nuances is critical. The 2024 edition of NFPA 70E clarified and emphasized verifying absence of voltage at points of work; the standard requires using an appropriate test instrument and following a verification sequence to establish an electrically safe work condition. For further discussion of the 2024 changes and voltage verification practices, see how NFPA 70E 2024 has changed voltage verification.
Key Safety Considerations for Proximity Testing
- Always Check the Voltage Range: Ensure your tester is rated for the system voltage you are testing. Using a tester on a voltage far outside its specified range can yield unreliable results or damage the instrument. Learn more about the definitions of high, medium, and low voltage to select the right tool.
- Environmental Conditions Matter: High humidity, rain, or snow can affect the performance of a proximity tester and insulating extension. Always follow the manufacturer’s guidelines for use in adverse weather.
- Never Use a Damaged Tester: If the self-test fails or there is any visible damage, immediately remove the device from service for repair or replacement.
- Maintain Situational Awareness: Always be aware of your minimum approach distance to all energized components in the area, not just the one you are testing.
Electrician Training and Qualification
Proficient use of a high voltage proximity tester is a learned skill that requires dedicated electrician training. This training is a core component of any reputable electrician school or apprenticeship program. Beyond initial training, ongoing education through online electrical courses and refresher training is essential for staying current with evolving technology and safety standards like NFPA 70E and applicable OSHA standards. A deep understanding of the principles found in the nec code book and related safety documents is what separates a qualified person from an untrained one, especially when working in high-risk environments.
Primary Sources
This article references standards and best practices established by leading safety and regulatory bodies. For direct information, please consult the official sources:
- NFPA 70E, Standard for Electrical Safety in the Workplace® – National Fire Protection Association
- OSHA Standard 1910.269 – Occupational Safety and Health Administration
Frequently Asked Questions
What is the main purpose of a high voltage proximity tester?
The main purpose is to verify the absence of voltage on medium- and high-voltage electrical systems from a safe distance before work begins. This is a critical step in establishing an electrically safe work condition and preventing electrocution or arc flash injuries.
How is a high voltage proximity tester different from a standard non-contact voltage pen?
A high voltage proximity tester is designed for high energy systems (typically above 1 kV or 1000 volts), has higher sensitivity, and is used with an insulating extension to maintain a safe distance. A standard non-contact voltage pen (NCVT) is intended for low-voltage residential and commercial voltages (commonly up to 1000V or lower) and is not appropriate for high-voltage systems without specific manufacturer approval and ratings.
Why is the ‘live-dead-live’ test method required by NFPA 70E?
The ‘live-dead-live’ method confirms your test instrument is working correctly immediately before and immediately after you test the target conductor. This protects against a false “dead” reading caused by a failed tester, which could lead a worker to touch a conductor they believe is de-energized but is actually live.
Can a high voltage proximity tester detect voltage through shielding?
No. Proximity testers work by detecting the radiated electric field. Shielded or concentric neutral cables are designed to contain this electric field. Therefore, a proximity tester cannot detect voltage through intact, grounded metallic shielding. Verifying de-energization on shielded cables requires different tools and procedures.
Continuing Education by State
Select your state to view board-approved continuing education courses and requirements:
Disclaimer: The information provided in this educational content has been prepared with care to reflect current regulatory requirements for continuing education. However, licensing rules and regulations can vary by state and are subject to change. While we strive for accuracy, ExpertCE cannot guarantee that all details are complete or up to date at the time of reading. For the most current and authoritative information, always refer directly to your state’s official licensing board or regulatory agency.
NEC®, NFPA 70E®, NFPA 70®, and National Electrical Code® are registered trademarks of the National Fire Protection Association® (NFPA®)
You may also like

Colorado Electrical Licensing Requirements and Reciprocity Guide

Standby Generators in DE: Navigating Coastal Storm Regulations
